Showing posts with label Tutorials. Show all posts

Hack Firefox For Maximum Internet Speed-How to Speed Up Firefox Using the About:Config Menu


Tricks To Increase Firefox Internet Speed

Mozilla Firefox is one of the most preferred internet browsers used all over the world. Right from its launch many years back, till today, it has got itself to a great success and received appreciation from many internet users all over. In terms of stability, it surpasses even Google Chrome while it is considered to be the second fastest internet browser after Chrome. And with these small hacks, Firefox can win over Chrome even in terms of speed.

Increase page loading speed

Here we are going to enable pipelining. Piplelining will let Firefox make more than one requests and thus increase loading speed.

Alter the entries as follows:
Set “network.http.pipelining” to “true”
Set “network.http.proxy.pipelining” to “true”
Set “network.http.pipelining.maxrequests” to some number like 10 (This means that it will make 10 requests at once.)

Then right-click anywhere and select New-> Integer. Name it "nglayout.initialpaint.delay" and set its value to “0“.

The integer we just added will order Firefox to act after 0 seconds after receiving information from user or from the servers. In simple language, it tells Firefox to act immediately after receiving any information, thus increasing its speed.

Altering these simple settings can make Firefox a lot faster. I have tried it myself and got good results.

But the bottom line is also that it will make your internet browsing faster and in a way, it will optimize your browser but the speed limit still lies in the hands of your ISP. The bandwidth set by your ISP is the limit of optimization. 

But why not take out the most of that bandwidth? If you try out these hacks, then do comment and share your experience with us. And share these tricks with your friends too!

Manual Resetting Method for Canon Pixma MP520

Manual Resetting Method for Canon Pixma MP520
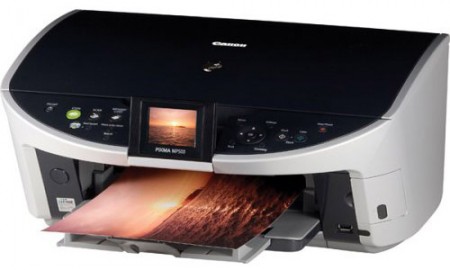
This reset procedure for Canon Pixma MP520 is taken from BilBg (Bulgaria) post in the fixyourownprinter forum, The reset procedure for reset counter in the Canon Pixma MP520 using button combinations. Some users in this forum which have tried this method (canon MP520 reset method) say this method work on Canon MP520.
Canon PIXMA MP520 Photo All-in-One inkjet printer with 2 inch TFT display that let user preview, scan, copy and print. This software compatible with Mac OS X, windows XP, 2K and Vista. This canon printer using system’s Dual Color Gamut Processing Technology for better copies. Price of Canon PIXMA MP520 printer in the market is $499.99.
Here Procedure Resetting Canon Pixma MP520 (Picture by BilBg):
To reset this canon printer model you follow the reset method in the picture.
  1. Switch the printer OFF
  2. Press buttons 1 + 2 + 3 and 4 (simultaneously using four fingers)
  3. Keep pressing this four buttons for 10 seconds
  4. Release the On/Off button (number 4) (Keeping pressing the others)
  5. After a few seconds (when the printer go ON) you can release buttons 1, 2, 3
A litte Notes by BilBg:
  1. Maybe step “c)” is not needed
  2. This procedure was used when I refilled the Black cartridge – try using the ColorCopy button instead of BlackCopy button (number 1) if you refill Color cartridge.
  3. Maybe there is no need for all the four buttons – you can try 1 + 4, 2 + 4 or 3 + 4. (or 1+2+4, 1+3+4, 2+3+4)

Replace Your Laptop’s, Netbook, Notebook Hard Drive

Replace Your Laptop’s, Netbook, Notebook Hard Drive

Not long ago, replacing your laptop’s hard drive meant packing up the system and shipping it back to its maker, or dropping it off with a local repair shop. Either way, you’d have to live without your beloved computing companion for some time, and depending on who was doing the work, you’d likely pay plenty. Fortunately, most of today’s notebooks allow easy access to their hard drives and certain other components. Here’s all you need to know about replacing your notebook drive without incurring tech-separation anxiety—or a big bill.
Step 1: Choose your drive well
The standard drives in modern laptops—excepting a few of the very slimmest ultraportables—conform to the 2.5-inch-wide hard drive form factor. Most laptop upgrade drives sold today are 2.5-inch and rotate at 4,200rpm, 5,400rpm, or 7,200rpm, offering capacities of 300GB or more. All else being equal, the faster the spin rate, the better the performance you should expect.
Drive prices vary depending on storage capacity, rotational speed, transfer rate, and the amount of buffer memory (cache). For example, a Seagate 200GB drive that spins at 7,200rpm and has a 3 gigabit (Gb) per second maximum transfer rate and 16MB of cache will cost around $150, whereas a slower (5,400rpm) 250GB drive with a 1.5Gb-per-second top transfer speed and an 8MB cache can be had for under $100. If sheer storage space is what you’re after, great deals abound on high-capacity drives that spin at 4,200rpm or 5,400rpm, whereas top-of-the-line, high-performance drives cost more and tend to offer extra features such as encryption and enhanced shock protection.
Ideally, your new hard drive will be faster and hold more data than its predecessor, but its most crucial parameter is whether it’s compatible with your laptop’s drive controller. Serial ATA (SATA) and Ultra ATA/IDE are the typical interfaces used in laptop systems. A typical ATA/IDE 2.5-inch laptop drive has a 44-pin edge connector and four jumper pins (resembling a desktop IDE drive), while SATA drives employ SATA-standard slot-style connectors. Some laptops employ a proprietary pin connector that connects the drive to the controller. Usually, this connector is mounted on the drive caddy (a carrier that inserts in the laptop’s hard drive bay) or attaches directly to the drive’s pins; either way, the connector must be detached from the old drive and connected to the new one.
A third possibility: Your old drive may employ a different type of connector—a ZIF connector—built into the drive itself. If yours does, make sure your new drive has the same type of connector. Another option is to purchase a converter that supports the interfaces on your drive and laptop, but your best bet is to match your new drive’s interface directly to the one used by your laptop, particularly if you’re dealing with tight spaces. The extra bulk or length added by a converter may prevent the drive from fitting properly.
Note that the overall thickness of your new hard drive may determine if it will fit into your system. You’ll almost certainly be replacing a 2.5-inch-wide drive with another 2.5-inch drive, but thicknesses can vary among these drives, so make sure you don’t purchase one that’s thicker than the original—it may not fit properly. If you’re unsure of your old drive’s measurements, check the specifications online, using the model number of the drive.
Most online sellers of laptop upgrade drives provide a drive-compatibility chart that lists nearly every popular laptop model out there and which drives will work with them, so be sure to do a little research before making your purchase. 

Step 2: Back up your files

There are a variety of ways to transfer files from your old drive (assuming it still works) to the new drive. Using software such as Genie Backup Manager Pro or NTI’s Backup Now to back up and restore your files makes sense if you already own an external drive. Another possibility: You can simply copy your data to blank CD or DVD media or to a portable USB or external Serial ATA (eSATA) storage device, but—depending on the type and amount of data involved—this can be time consuming. If you don’t own an external hard drive, consider using an online service such as MozyHome Online Backup (www.mozy.com) to archive and store your data until the new drive is installed. (We recommend this only for relatively small amounts of data, since uploading can take a while.) The easiest way to get back up and running without having to reinstall your operating system and applications is to use a drive-imaging program such as ShadowProtect Desktop 3.2 (www.storagecraft.com) to transfer the entire contents of your old drive, including the operating system and your personal system settings, to the newly installed drive. Again, though, you’ll need external storage to use as an intermediary.Another option: The $49 USB 2.0 Data Transfer Kit from CMS Products (www.cmsproducts.com) is a USB-based system comprising software and an empty external drive case. You install your upgrade drive into the case and duplicate the contents of your old drive straight to the new one. You then swap the drives; the new drive in your laptop now contains your complete OS, data, and apps, and, as a bonus, you can use the old drive in the enclosure as an external backup unit. 

Step 3: Remove your old drive

A laptop hard drive is usually easy to remove or install—the process requires nothing more than a set of jeweler’s screwdrivers, a well-lit workspace, and a user’s manual.
Before doing anything else, unplug the laptop and remove the battery to avoid potential damage to the motherboard (and yourself). Turn the laptop upside down and look for a removable panel or a hard drive release mechanism. Laptop drives are usually accessible from the bottom or side of the chassis. Typically, you release the drive by flicking a lock/unlock button and/or removing a screw that holds the drive in place.
If you’re unsure how to physically remove the drive, refer to your user’s manual or visit the vendor’s Web site for detailed instructions. Also, check out Web-based user forums for discussions about your brand of laptop. Message boards often hold a wealth of firsthand reports.
Once the old drive has been removed from the chassis, you may have to extract it from a caddy or detach a set of mounting rails from its sides. If so, attach the rails or caddy to the new drive right away to keep the screws and washers from getting lost. If a connector is attached to the old drive’s signal pins, remove it and snap it onto the new drive. If you feel resistance, do not force it; you may have it upside down. Damaging the signal pins may render the drive useless.

Step 4: Install your new drive

Next, install the drive in the laptop in the reverse of the manner that the old drive was removed. If it’s a slide-in drive on a caddy, it should slide smoothly into the drive slot and produce a faint click when the connectors engage. If the drive sits flush into a panel on the bottom of the laptop, you may have to insert one edge first (usually the edge with the interface connector) to produce a snug fit. Again, if you feel resistance, or if the drive doesn’t fit properly, take it out and try again. Never force it (or any component) into place. Look for obstructions, and make sure the caddy or rails are installed correctly and that all retaining screws are tight and flush. Once the drive is installed, secure it with any screws you removed earlier and slide the locking mechanism (if any) into the locked position. 

Step 5: Configure the new drive

When you power up the notebook, the system BIOS should automatically recognize the new drive. If you created a bootable backup disc or a complete image disc, place it in the optical drive and follow the application’s instructions for restoring your data. You may have to update a driver or two, but you should otherwise be ready to go. If you are performing a clean Windows installation, use the original OS disc and have your CD key code handy. Follow the formatting and partitioning instructions, and load the operating system. Once the OS installation is complete, you can begin installing your applications and any necessary drivers. Then copy over any data you’ve stored on external drives or discs—and enjoy your companion’s new storage horizons right away.

Manual Reset Methods for Canon MP500 All In One Printer

Manual Reset Methods for Canon MP500 All In One Printer
The Canon PIXMA MP500 All-In-One Photo Printer is printer with Copier and Scannerfeatures. The Canon MP500 is a great printer from Canon. In the market this printer priced about$150. The best feature from the Canon MP500 is easy to setup, excellent printing quality output, provide color display LCD, provides memory slot to print directly from memory card, easy to  scan and copy document and this printer is a cheap printer (with price $150 it beats most of the $300-400 printers).
The basic problem in all canon Problem is counter. The software resetter for Canon PIXMA MP500 at this time not available in internet. To reset this you can do manual reset mentioned below. To reset this canon printer model you must enter into service mode then reset the counter from service mode.
The reset method for Canon Pixma MP500 All-In-One Photo Printer
1. Entering into Service Mode
  1. Start with printer connected to power cord (electric source)
  2. Press and hold STOP/RESET button.
  3. Press and hold POWER button.
  4. Release STOP/RESET button without releasing power button.
  5. Click STOP/RESET two times and then release power button.
2. Reset the Canon Pixma MP500 All-In-One Photo Printer
  • After the printer entering into service mode, prepare paper on the printer paper tray
  • Press Stop/reset button for 1 times and then press power button, await till printer finished print.
  • Press Stop/reset button for 2 times and then press power button, The printer will print again. Await till printer finished print again.
  • Press Stop/reset button for 3 times then press power button to reset EEPROM.
  • Press Stop/reset button for 4 times then press power button to reset Waste Ink Counter.
  • Switch off the printer. if printer doesn’t turn off, press button power until printer off.
Download software resetter for canon printer

Led Error code for Canon IP1300, IP1700, IP1200, IP1880, IP1980

Led Error code for Canon IP1300, IP1700, IP1200, IP1880, IP1980

Having problem with Canon IP1300, IP1700, IP1200, IP1880, IP1980. Sign that looked to be only led blinking. Following some solutions problem of printer that marked with led blinking.

3x Orange 1x green
Problem : any problem with printer mechanics
Solution: If you don’t have knowledge about printer mechanic, will better if bring the printer to Canon service center.
4x orange 1x green
Problem printer absorber full
Solution: Reset the printer using generaltools or software resetter. If not work using reset manual. Each printers having different set of manual reset
5x orange 1x green
Problem: Black or Color cartridge trouble.
Note: problem is usually caused many matters, for example chips error, conector is dirty, etc.
7x orange 1x green
Problem: Black or Color cartridge trouble.
Note: problem is usually caused many matters, for example chips error, conector is dirty, etc.
8x orange 1x green
Problem printer absorber full (Waste Ink Pad Full)
Solution: Reset the printer using generaltools or software resetter. If not work using reset manual. Each printers having different set of manual reset

Fix Error 43 Code In Windows 7

Fix Error 43 Code In Windows 7

Although it may also happen on other versions ofWindows, it seems that Windows 7 is the most vulnerable one to Error 43. This is the error Windows users receive when one of the devices attached to their system stops functioning properly, possibly due to driver issues. Unfortunately, it may also trigger other errors. However, it is of utmost importance to keep in mind that error code 43 mainly shows up due to some problems with the computer hardware.

For those of you who are not so familiar about driver, it is a program that is meant to control the corresponding hardware. Driver usually comes along with the hardware you buy. Without a driver, your computer hardware won’t be able to function properly. So, when Windows detects something that seems wrong with the hardware, it will raise error code 43.

Reinstall Drivers
To solve the error, you may have to install the damaged the drivers all over again.

  • To do this, you can click on Start followed by Run and then type sysdm.cpl before clicking on the OK button.
  • Then, navigate to the Hardware tab System Properties and click on the button that says Device Manager.
  • Double Click on the Device Type
  • Here, you will have to choose and double-click on the troublesome device from the list.
  • This will open up the device’s Properties dialog box. Click on Uninstall and wait for the process to finish.
  • Then, you need to select scan for hardware changes which will lunch the Add Hardware wizard now reinstall or prompt yours device driver again.
Reconnect or Remove Yours Hardware Devices
Yet, if that does not work, you may need to open up the case of your computer. This way, you will be able to unplug the device from your system. However, of course, you will have to turn off your computer and make sure that it is not connected to the power outlets at all prior to opening up the case. Then, when you have physically unplugged the device, try plugging it back in and make sure it is not loose. This may trick Windows into considering that you have just attached a new device and it may then install a fresh driver for the device.

Clean your Registry
If that still does not work, you may have to do something about your registry. For your information, it is the registry that stores all information and settings with regards to your Windows operating system. So, there is a potential that error code 43 you are encountering is due to some false information in the registry. To fix it, you may need to download and install a registry cleaner that will solve your problem automatically. Fortunately, you can find loads of them on the internet today.

How to fix Code 39 error with DVD/CD-ROM drives in Windows XP or Vista

How to fix Code 39 error with DVD/CD-ROM drives in Windows XP or Vista

I was fixing a computer the other day and ran across the following error in Device Manager on the CD-ROM drive. "Windows cannot load the device driver for this hardware. The driver may be corrupted or missing. "(Code 39)" Because of this error, the drive did not show up in My Computer and the customer was unable to burn CDs or read any CDs.

I uninstalled the drive from Device Manager, rebooted the computer, and the problem remained, so obviously it appeared to be a registry issue that I would have to solve. If you are receiving this Code 39 error and your CD or DVD drive is missing and has a yellow exclamation mark in Device Manager, I hope this information is useful.


To solve this Code 39 error, follow these instructions: 
NOTE: After removing these registry keys and rebooting, it may be necessary to reinstall any CD or DVD recording applications. 
1.) Close all open programs
2.) Click on Start, Run, and type REGEDIT and press Enter 
3.) Click on the plus signs (+) next to the following folders 
  • HKEY_LOCAL_MACHINE SYSTEM 
  • CurrentControlSet 
  • Control
  • Class {4D36E965-E325-11CE-BFC1-08002BE10318} 
4.) This folder is the DVD/CD-ROM Drive Class Description in the registry. Look for any of the following  names in the right hand column. 
  • UpperFilters 
  • LowerFilters
  • UpperFilters.bak 
  • LowerFilters.bak 
5.)If any of the above keys shown in step 4 are listed, right-click on them and choose Delete 

6.) After deleting the keys, close the Registry Editor 

7.) Reboot your computer 

8.) Open My Computer and check to see if your CD or DVD drives have returned. You may also want to open Device Manager and verify that the yellow exclamation and error code on the CD or DVD drive is gone. 

How to Start Windows in Safe Mode

How to Start Windows in Safe Mode

Many times in order to remove a piece of spyware or for troubleshooting and diagnostic purposes, you'll have to start Windows in Safe Mode. While in Safe Mode, only specific programs and files needed to run the operating system are loaded. Some functions, such as connecting to the Internet, will not be active in Safe Mode and a standard video driver will be loaded causing a washed out look and a possible change in resolution. There are currently 3 ways to start Safe Mode: Normal Safe Mode, Safe Mode with Networking (normally the Internet will work in this mode), and Safe Mode with Command Prompt.

However, since only the essential programs and files are loaded in Safe Mode, this allows us to remove some spyware, adware, viruses and such that cannot be removed in Normal Mode. Follow the instructions below to Start Safe Mode for your specific version of Windows. If you are trying to delete a file that is not allowing you to delete it (even in Safe Mode), you may want to read my article on How to Delete an Undeletable File.

Windows 7
  • Turn the computer on or Restart the computer.
  • Start tapping the F8 key. The Windows Advanced Boot Options Menu appears. If you begin tapping the F8 key too soon, some computers display a "keyboard error" message. To resolve this, restart the computer and try again.
  • Ensure that the Safe mode option is selected, not Repair Your Computer
  • Press Enter. The computer then begins to start in Safe mode.
  • When you are finished with troubleshooting, close all programs and restart the computer as you normally would
Windows Vista
Windows Vista is similar to Windows XP for starting in Safe Mode.
  • Turn the computer on or Restart the computer
  • Start tapping the F8 key. The Windows Advanced Boot Options Menu appears. If you begin tapping the F8 key too soon, some computers display a "keyboard error" message. To resolve this, restart the computer and try again.
  • Ensure that the Safe mode option is selected (the top option)
  • Press Enter. The computer then begins to start in Safe mode.
  • When you are finished with troubleshooting, close all programs and restart the computer as you normally would.
Windows XP
If Windows XP is the only operating system installed on your computer, booting into Safe Mode with these instructions.
  • If the computer is running, shut down Windows, and then turn off the power
  • Wait 30 seconds, and then turn the computer on.
  • Start tapping the F8 key. The Windows Advanced Options Menu appears. If you begin tapping the F8 key too soon, some computers display a "keyboard error" message. To resolve this, restart the computer and try again.
  • Ensure that the Safe mode option is selected.
  • Press Enter. The computer then begins to start in Safe mode.
  • When you are finished with all troubleshooting, close all programs and restart the computer as you normally would.

Beep Error Codes on Award BIOS

Beep Error Codes on Award BIOS

Unfortunately there are many versions of the Award BIOS, and they are supported not by one company, but by the motherboard maker. Award's website states "Award Software software products are sold to a board or system manufacturer ("hardware vendor"), who customizes them further before selling the system. Award Software cannot supply upgrades for a BIOS that has been subsequently modified by hardware vendors." 

To make matters worse, Award BIOS merged with Phoenix Technologies in 1998. The hardware vendor that designed your system is the best source for bug fixes and answers about your system, but after so many mergers the Award BIOS is a difficult one to support.

Beep Error Codes on Phoenix BIOS

Beep Error Codes on Phoenix BIOS

These audio codes are a little more detailed then the AMI codes. This BIOS emits three sets of beeps. For example, 1 -pause- 3 -pause 3 -pause. This is a 1-3-3 combo and each set of beeps is separated by a brief pause. Listen to this sequence of sounds, count them, and reboot and count again if you have to.


1-1-3Your computer can't read the configuration info stored in the CMOS. Replace the motherboard.
1-1-4Your BIOS needs to be replaced.
1-2-1You have a bad timer chip on the motherboard. You need a new motherboard.
1-2-2The motherboard is bad.
1-2-3The motherboard is bad.
1-3-1You'll need to replace the motherboard.
1-3-3You'll need to replace the motherboard.
1-3-4The motherboard is bad.
1-4-1The motherboard is bad.
1-4-2Some of your memory is bad.
2-_-_Any combo of beeps after two means that some of your memory is bad, and unless you want to get real technical, you should probably have the guys in the lab coats test the memory for you. Take it to the shop.
3-1-_One of the chips on your motherboard is broken. You'll likely need to get another board.
3-2-4One of the chips on your motherboard that checks the keyboard is broken. You'll likely need to get another board.
3-3-4Your computer can't find the video card. Is it there? If so, try swapping it with another one and see if it works.
3-4-_Your video card isn't working. You'll need to replace it.
4-2-1There's a bad chip on the motherboard. You need to buy another board.
4-2-2First check the keyboard for problems. If nothing, you have a bad motherboard.
4-2-3Same as 4-2-2.
4-2-4One of the cards is bad. Try yanking out the cards one by one to isolate the culprit. Replace the bad one. The last possibility is to buy another motherboard.
4-3-1Replace the motherboard.
4-3-2See 4-3-1
4-3-3See 4-3-1
4-3-4Time of day clock failure. Try running the setup program that comes with the computer. Check the date and time. If that doesn't work, replace the battery. If that doesn't work, replace the power supply. You may have to replace the motherboard, but that is rare.
4-4-1Your serial ports are acting up. Reseat, or replace, the I/O card. If the I/O is on the motherboard itself, disable them with a jumper (consult your manual to know which one) and then add an I/O card.
4-4-2See 4-4-1, but this time is your Parallel port that's acting up.
4-4-3You math coprocessor is having problems. Run a test program to double-check it. If it is indeed bad, disable it, or replace it.
Low 1-1-2Your motherboard is having problems
Low 1-1-3This is an Extended CMOS RAM problem, check your motherboard battery, and motherboard.

Beep Error Codes on Standard Original IBM BIOS

Beep Error Codes on Standard Original IBM BIOS

1 short beepNormal POST - system is ok
2 short beepsPOST Error - error code shown on screen
No beepPower supply or system board problem
Continuous beepPower supply, system board, or keyboard problem
Repeating short beepsPower supply or system board problem
1 long, 1 short beepSystem board problem
1 long, 2 short beepsDisplay adapter problem (MDA, CGA)
1 long, 3 short beepsEnhanced Graphics Adapter (EGA)
3 long beeps3270 keyboard card

IBM POST Diagnostic Code Descriptions

100 - 199
System Board
200 - 299Memory
300 - 399Keyboard
400 - 499Monochrome Display
500 - 599Color/Graphics Display
600 - 699Floppy-disk drive and/or Adapter
700 - 799Math Coprocessor
900 - 999Parallel Printer Port
1000 - 1099Alternate Printer Adapter
1100 - 1299Asynchronous Communication Device, Adapter, or Port
1300 - 1399Game Port
1400 - 1499Color/Graphics Printer
1500 - 1599Synchronous Communication Device, Adapter, or Port
1700 - 1799Hard Drive and/or Adapter
1800 - 1899Expansion Unit (XT)
2000 - 2199Bisynchronous Communication Adapter
2400 - 2599EGA system-board Video (MCA)
3000 - 3199LAN Adapter
4800 - 4999Internal Modem
7000 - 7099Phoenix BIOS Chips
7300 - 73993.5" Disk Drive
8900 - 8999MIDI Adapter
11200 - 11299SCSI Adapter
21000 - 21099SCSI Fixed Disk and Controller
21500 - 21599SCSI CD-ROM System

Disabling Low Ink Level Notification for Canon IP and MP

Disabling Low Ink Level Notification for Canon IP and MP

The reset method work for canon printers that using PG-40 and CL-41 cartridges. After doing this reset method your printer will not display low ink notification anymore and will not show error code “E4″ or “E5″.
Here how, the method to reset ink level notification:
  1. Push “resume” for 5 seconds for canon IPXXXX. For canon MPXXX you must enter to service mode.
  2. Push Power switch then remove power cord.
  3. Insert plug power cord while pressing “power switch” at the same time.
  4. Push Start/reset by step 2 continue Wait display shown “0″
  5. Push + change display from “0″ to “1″
  6. Push color button 2 times
  7. Push Power switch again , Printer will print 1 page
  8. Open cover
  9. Unplug power cord
  10. Take out ink cartridge #40 and #41
  11. Insert plug again
  12. Push power switch
  13. Open cover (scan cover)
  14. Insert ink cartridge #40 and #41 again
Enter to service mode for canon MPXXX

How to Make 3D Glasses

How to Make 3D Glasses


Reveal Hidden Windows 7 Wallpapers

Reveal Hidden Windows 7 Wallpapers

When installing Windows 7, you will always get asked what country you are from. Then, based on what you choose, Windows will give you wallpapers to suit your choice. If you choose United States, you will most likely get some scenic views such as the eye candy wallpaper displaying the national park and the outdoors treatment you can possibly find in the US. However, there are actually some other pieces of wallpapers that you can reveal.
These said wallpapers are stored in the C:\Windows\Globalization\MCT folder. You may need to unhide the folder if it is hidden.

To do that, you may want to push Windows key + R and type into run box %systemroot%/Globalization/MCT. If this doesn’t work click in the window Organize button, and select Folder and search options now select View tab there, you can choose to show or hide files and folders on the View tab.

Now first uncheck Hide protected operating system files and second click on Show hidden files, folders, and drivers apply and click ok, and you are done!

In the folder, you may see a few subfolders named ZA (for South Africa), US (United States), GB (Great Britain), CA (Canada) and AU (Australia). Inside each of those folders, you may find a subfolder labeled as Theme. When you get into the subfolder and run the file ending in .theme extension, you will activate the corresponding set of visual theme. You can then use this theme by right clicking on your Windows desktop and choose Personalization. You will see new themes under My Themes. Now just double click on the theme and you’re done!

However, if you find that the themes available in those folders are not quite attractive, you may want to get some additional themes from the Microsoft website. In addition to that, there is also a third party website which is pretty interesting to visit. The website author has compiled loads of wallpapers you can use for your Windows operating system.

Windows Vista Cannot Connect To The Printer. Access is Denied


Windows Vista Cannot Connect To The Printer. Access is Denied

One of the more interesting errors in Windows Vista happens when you try to connect to a shared network printer. Most of the time you'll receive an "Access is Denied" error when trying to connect even though you can see the printer on the network and everything else is working properly.


Everything else on the network appears to work properly, shared files, internet access, etc. However, you just cannot access the ahared printer and print. The solution is to add the printer as a local printer and then try printing.

Follow the directions below to accomplish this.
  1. Go into Control Panel
  2. Underneath the Hardware and Sound category, click on Printer
  3. Click on Add a printer from the top menu
  4. Click on Add a Local Printer
  5. Choose Create a New Port with type of port remaining Local Port, then click Next
  6. In the Port Name box type the path to the printer you wish to connect to and Click Ok  Ex. \\mycomputer\myprinter
  7. In the Install Printer Driver screen, select your printer from the list or choose Have Disk and find the location of the printer drivers on the computer then click Next and then click Finish.
  8. You should now see the printer installed in the Printers window.
  9. Right-click on the printer and click Properties
  10. On the General tab, click Print Test Page to test the printer.
You should now be able to printer from Windows Vista to this networked printer with any problems.

“Windows could not start because the following file is missing or corrupt” error on startup

“Windows could not start because the following file is missing or corrupt” error on startup

Today I was scheduled to repair Toshiba Satellite Pro M10-S405 laptop with a “software problem”. The customer complained that he is getting the following error right after he turns on his laptop.

ERROR
Windows could not start because the following file is missing or corrupt:
System32\Drivers\ntfs.sys

I started the laptop and got the above mentioned error right away. Restarted it again and on startup a different file was missing:
System32\Drivers\pci.sys

If you search on the internet for these errors you will find a lot of tips how to fix it. Unfortunately, on most websites this error is mentioned only as a software problem. They say that you can fix it if you replace corrupted files from a Windows CD using a recovery console. I guess in some cases you can fix the problem by replacing corrupted files, but from my experience I know that these kinds of errors are very often caused by a faulty memory module.
I started testing the memory on the laptop with Memtest 86+ utility and the memory failed right away. The laptop had 2 memory sticks installed. I tried to eliminate a bad stick by removing and installing modules one by one into different slots on the system board. The same pattern occurred on startup:

- the laptop booted to Windows fine when only slot 1 was populated (tried both memory sticks)
- the laptop wouldn’t boot at all (there were no video) when only slot 2 was populated
- the laptop booted with a missing file error when both memory slots were populated

Unfortunately, it this case the error was caused by a defective memory slot on the system board, not just a bad memory stick. To fix the problem I had to replace the entire system board.
Conclusion: if you get a missing file error on startup and replacing the corrupted file doesn’t help, check the memory sticks on your laptop.

Login Factory Service Mode: Viewsonic LCD Monitor

Login Factory Service Mode: Viewsonic LCD Monitor


Press and hold the "2" button, power on the lcd monitor. The LED light will show yellow color, then press "1" button to open the menu. Inside the osd menu, you can see "F" or "Factory Menu" charactor show on bottom. Now, try to move selection to this charactor and press "2", then you can login to factory service mode.
  1. Before on lcd monitor, press and hold the "2" button then on the lcd monitor power.
  2. After on lcd monitor, press "1" to open the osd menu. 
  3. Now, you can see bottom of the menu extra more one selection for "Factory Menu". 
  4. Press the "2" button, you can login to the factory service mode.
  5. The information of Viewsonic LCD Monitor factory service mode.

Login Factory Service Mode: Samsung LCD Monitor

Login Factory Service Mode: Samsung LCD Monitor

Power on the lcd monitor and open the osd menu. Go to the Bringhtness and Contrast function section, minimize the value until 0. Now, go to "i" information page, press and hold the "SOURCE" button (this also call ENTER button) until the screen pop up(about 5 second) the "SERVICE FUNcTION" menu.
  1. Firstly, minimize the brightness and contrast value until zero.
  2. Inside the osd menu, go to the information page and press & hold "SOURCE" button , hold that button about 5 second, then you can login to factory service mode. You can see the screen show out the result of how many hours are used by this lcd monitor.
  3. This is the Samsung 931c lcd monitor factory service mode.
  4. Some model of Samsung LCD Monitor, they don't have the "SOURCE" button, you can use the ENTER "←I" button to replace it. Both function are the same. 
  5. The Samsung LCD Monitor model 205BW and 931C, their factory service mode are the same information.
  6. The Samsung 930BA LCD Monitor, this model factory service mode are have some difference with the above model. You can see the model 930BA lcd monitor factory service mode have extra information on Scaler-MCU and LCD Panel Info.

Login Factory Service Mode: Philips LCD Monitor

Login Factory Service Mode: Philips LCD Monitor

The login method are similar like the Acer. Press and hold the "AUTO" & "MENU" button, then press "POWER" button to on the lcd monitor.Now, open the osd menu, at the bottom of menu, you get the extra selection and you select it, then you can login to factory service mode. (Some model use the "AUTO" and "OK" button to on the power.)
  1. Press and hold "AUTO" & "MENU" button, the press "POWER" button to open lcd monitor.
  2. Now, press the "MENU" button to open osd menu, you will get the extra selection on the menu.
  3. The extra selection are at the bottom of menu. Go to select it.
  4. After select, press "ENTER" button, then you can login to the lcd monitor factory service mode.
  5. This Philips 170B7 LCD Monitor factory service mode, you can get a lot useful information and funtions to use. This lcd monitor use CPT made lcd panel with model CLAA170EA07Q and others info.

Dell LCD Monitor: Login Factory Service Mode Method

Dell LCD Monitor: Login Factory Service Mode Method

Login Factory Service Mode Method
  1. Press and hold the "AUTO" & "+" button (some model are use "ENTER" and "+" button), then power on the lcd monitor.
  2. After on monitor, press the "MENU" button to open the osd menu.
  3. Now, in the osd menu, you can see at the bottom of menu have an extra selection "FACTORY" on it.
  4. Go to that "FACTORY" selection and press the "ENTER" button.
  5. OK, you're login to the dell lcd monitor factory service mode.